This page is a work in progress and may not reflect actual results experienced in game.
This page shows all the current trade routes in the Grand Isles. To use this page, select the port where you are coming FROM and view the data about that location. You will find the standard cargo rates for this location, the average number of doubloons you earn from this location, and how much higher or lower the payouts are compared to all the other traders in Tradelands.
Trade Route Calculator
The trade calculator can help you find the most profitable routes by calculating which destinations provide the best payout by Trade Velocity. To use the calculator, select the port you are current at, insert the numbers for each cargo type at the trader. This will tell you which port will provide the best price per distance.
Select your Current Port:| Port Name | Break Even Price | Current Cargo Value | Profitability |
|---|---|---|---|
| Fenwick | 261 | – |
|
| Freeport | 301 | – |
|
| Nassau | 393 | – |
|
| Perth | 241 | – |
|
| Blackwind Cove | 303 | – |
|
| Nova Balreska | 240 | – |
|
| Salem | 329 | – |
|
| Fort Verner | 310 | – |
|
| Harrisburg | 394 | – |
|
| Cannoneer’s Key | 401 | – |
|
| Whitecrest | 299 | – |
|
| Burkeland | 887 | – |
Profitability Matrix
If the calculator above doesn’t work for you, or you want to see all ports side-by-side, the matrix below shows all of the trade routes on a single visual. It shows the amount that cargo has to sell for in order to hit the Trade Velocity shown on the Ship Building Guide page. Click the picture to enlarge it:

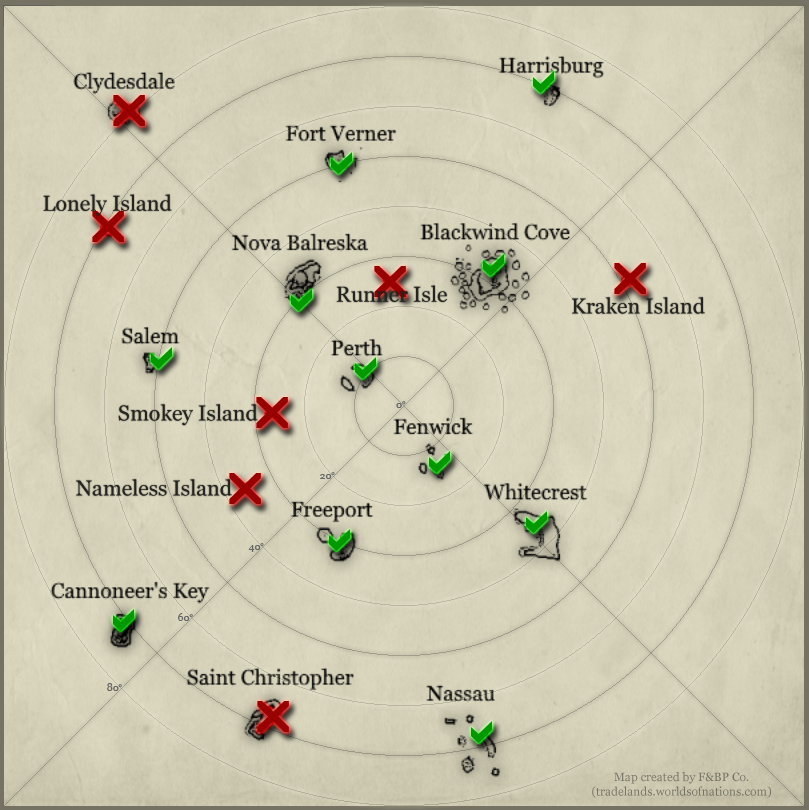
Trader Location Map
The map below shows which islands have a trader on them, with the check mark indicated their rough location on the island. Note that this map uses Wind Sectors, which is a method of navigating that allows you to maintain your heading at the best possible speed without constant course corrections. This method is slightly different in the new version of the map, so some locations will not be in the spot as depicted below.